Custom Travel Kit: All-in-One Set
A custom all-in-one pet travel kit is specified as a curated set of four to eight components in one case or box, built to a single palette and one logo system, at MOQ 500 sets. The decisions that define it are the tier structure, the component list and the outer case geometry. A well-architected three-tier kit ladder sells more than any single component in it.
A kit is a range strategy expressed as a single SKU, and it should be briefed that way: the value is in the architecture, not in the individual items. Our standard envelope is MOQ 500 sets, samples in 6-10 working days for a component-and-case review, bulk production in 35-50 days after approval, and inspection at AQL 2.5 with a defect list covering component count, case construction, print registration and insert completeness. Payment is T/T 30/70, FOB Xiamen.
Two rules keep kit programmes on schedule. First, freeze the component list before the case is designed, because a case designed around a component that later changes is the single most common cause of a re-sample. Second, decide the palette once, across every component and the case together, because a kit is the one product where a colour mismatch between parts is immediately visible and impossible to explain away.
Two further rules keep kit programmes profitable. Restrain the component count: four well-chosen items read as considered, while eight mediocre ones read as cheap, and the case and the inserts - not the contents - are what carry perceived value. And design for dimensional weight from the outset, because a case full of air is charged by volume rather than by mass and can cost more to ship than the components inside it.
Personalized pet carrier embroidery is priced by stitch count and placement, so a chest panel and a full back panel are not comparable line items.
The Travel Kit as a Range Strategy, Not a Bundle
There is a meaningful difference between a bundle and a kit, and confusing the two is why so many sets underperform. A bundle is several existing products put in one box, priced at a discount, and it behaves like a promotion. A kit is a designed set: components chosen to work together, a case designed around them, a palette applied across all of them, and a price justified by the whole rather than by the sum of the parts. Bundles clear inventory; kits build a brand.
That distinction shows up in the buying decision. A shopper comparing a bundle to its component prices is doing arithmetic and will conclude that the discount is not large enough. A shopper looking at a kit is judging whether the set solves a problem - a weekend away, a first trip, a hotel stay - and is far less likely to price each item separately. Designing for the second shopper is the entire commercial case for this SKU.
Kits are also the most efficient way to introduce a range. A brand with no shelf presence can present four or five products at once inside a single box, in one palette, with one story. Retailers who would never give space to five separate unknown SKUs will often give space to one set, because the set occupies one slot and merchandises itself. For a new private label programme, that is frequently the fastest route onto a shelf.
The gift argument is strong and specific. Travel kits are bought for other people - for a new puppy owner, for a friend who travels with a dog - which means the buyer is not the user and cannot evaluate function. They evaluate presentation. That reverses the usual priority: for a kit, the box, the insert card and the colour coherence matter more than any individual component's specification.
One caution on scope. The most common failure in kit design is over-filling. Eight mediocre components read as cheap; four excellent ones read as considered. Restraint is the single strongest signal of quality available in a set, and it also improves margin, because the case and the inserts - not the contents - are what carry perceived value.
Set Architecture: Tiers, Roles and Price Ladders
The structural decision that matters most is the tier ladder, because it determines how the range reads and how the customer decides. A three-tier structure is almost always right: an entry set that solves one trip, a core set that solves a weekend, and a premium set that solves a holiday. Three tiers give a shopper a choice without paralysing them, and they give a retailer a clear good-better-best story.
Each tier should have a defined role rather than simply more items. The entry set is the impulse and gifting purchase, and should be small enough to sit near a checkout. The core set is the volume SKU and should contain the components most people actually use. The premium set is the halo product and should contain at least one component that does not appear in the lower tiers, so the upgrade has a reason to exist.
| Tier | Components | Case type | Role | Price position |
|---|---|---|---|---|
| Entry - day trip | 3-4 items | Soft zip pouch | Impulse, gifting, checkout placement | 1.00 |
| Core - weekend | 5-6 items | Structured case with handle | Volume SKU, main shelf block | 1.85 |
| Premium - holiday | 7-8 items, one exclusive | Rigid or moulded case | Halo, seasonal feature, press product | 3.10 |
Component selection should follow use order rather than price. The kit is opened in a sequence - arrive, feed, walk, settle - and the components should be arranged in that order inside the case. A kit where the bowl is at the bottom and the waste bags are on top tells the customer nobody thought about how it would be used, and that impression is formed in the first ten seconds.
Consumable components deserve deliberate treatment. Including one consumable - wipes, waste bags, a travel-size shampoo - creates a repurchase reason and makes the kit feel generous for very little cost. Better still, design the case with a dedicated refill slot for that consumable, so the empty space becomes a visible prompt. That single detail converts a one-off gift into a repeat relationship.
Finally, tier boundaries should be visible in the packaging rather than only in the contents. A different case material, a different closure, a different accent colour per tier lets a shopper identify the ladder from two metres away, and lets the retailer merchandise three price points without three explanations.

Component Selection and Fit Inside the Kit
Fit is the engineering discipline that separates a designed kit from a box of products. Every component should have a defined place in the case, and the case should be designed around those places rather than chosen from a catalogue. That means the component list must be frozen first, with dimensions, and only then does case design begin.
The components that work best in a travel kit share three properties: they are small, they are rigid or semi-rigid so they hold a predictable shape, and they are used on a trip rather than at home. A collapsible bowl is the ideal kit component for exactly these reasons - it nests flat, it defines its own volume, and nobody uses it at home. A water bottle, a measuring scoop and a waste-bag holder share the same profile.
Soft components are harder but worth including, because they are what make a kit feel generous rather than utilitarian. A folded blanket or a small towel fills void space, protects rigid components in transit, and lifts perceived value disproportionately to its cost. The design trick is to make the soft item a structural element - a wrap or a divider - rather than something floating loose in the case.
- Nesting: design components to nest into one another so the packed volume drops and the case can be smaller.
- Void space: a case with loose space looks unfinished; fill it with a soft item or a printed insert, never with loose packing material.
- Retention: elastic loops, moulded trays or die-cut inserts hold components in place; a component that rattles reads cheap.
- Refill slot: one defined space for a consumable converts a one-off purchase into a repeat one.
Weight distribution is a small detail with real effect. A case that is heavier on one side swings awkwardly when carried, and a case whose heaviest component sits at the bottom rather than against the back panel pulls away from the body. Lay out the components flat, weigh the arrangement, and adjust the case's handle position rather than accepting the obvious one.
Unifying Colour, Material and Logo Across Components
A kit is the one product where colour coherence is not optional. Components made from different materials - silicone, textile, moulded plastic, coated metal - will not match from a single formula, and the differences are sitting side by side in the same box. The only workable approach is to approve every component's colour together, in one session, under one light source, against one set of Pantone references.
Accept that exact matching is not achievable and design around it. The professional solution is a deliberate shade family: specify the core neutral to a tight tolerance across all components, and let the accent colour vary within a wider, stated band. That way the eye reads consistency where it matters and forgives variation where it does not. Trying to force a perfect match across five substrates adds cost and still fails.
Material finish should be unified as well as colour. If the case is matte, the rigid components should be matte; if the case has a soft-touch surface, at least one component should echo it. A kit with a matte case, a glossy bowl and a high-sheen bottle reads as three products from three ranges, regardless of how close the colours are.
Logo application should follow a size hierarchy rather than a uniform rule. The case carries the full lockup at its largest. The largest component carries the wordmark at a reduced size. Smaller components carry the icon only. This hierarchy is how a designed set looks deliberate: uniform logo sizes across very different objects is the visual signature of a bundle rather than a kit.
Textile components in the kit should carry OEKO-TEX certification, because a kit is often bought as a gift and the recipient will look for reassurance. Certification marks are also the one piece of technical information that belongs on the outside of a gift box, because they signal care without cluttering the design.
Gift Box Structure, Inserts and the Unboxing Sequence
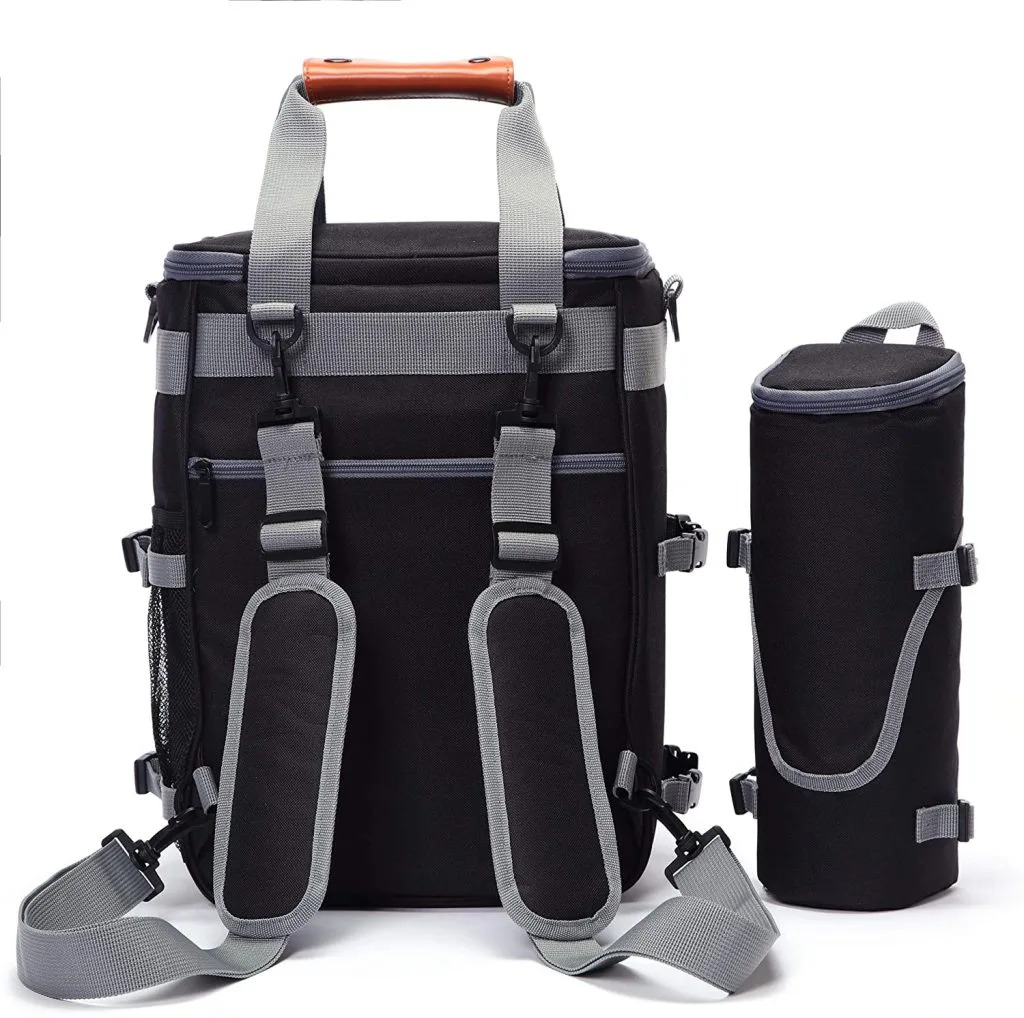
The outer box is the product. A kit bought as a gift is judged entirely on its box for the first thirty seconds, and in most cases the buyer never sees the components before purchasing. That means the box should be specified as carefully as any component: board weight, closure, surface finish and print all carry more commercial weight here than they would on any other SKU in the range.
Three structures cover the category. A rigid two-piece box with a lift-off lid gives the strongest gift impression and the best print surface, at the highest unit cost and freight volume. A structured case with a zip or a clasp doubles as part of the product - the case is used on the trip - which justifies its cost and is the better choice for a travel kit specifically. A printed sleeve over a plain box is the cheapest and the weakest, and suits an entry tier only.
For a travel kit, the reusable case is usually the right answer, because it converts packaging into function. A customer who would resent paying for a rigid box accepts a case they will use on every trip. The design implication is that the case must be genuinely good - a quality zip, a structured shape, a wipe-clean lining - rather than a decorated bag.
The unboxing sequence should be designed as a sequence. First sight when the lid lifts should be the largest, most recognisable component, ideally framed by a die-cut tray. Beneath that, components revealed in use order. At the bottom, the consumable and the refill prompt. This ordering is a design decision, it costs nothing, and it is the difference between an unboxing that feels considered and one that feels like a parcel.
Printed inserts do the last of the work. Three pieces are enough: a contents card listing what is inside and why, a care card covering cleaning and storage, and a range card showing the rest of the collection in the same palette. The contents card is the one that gets read, and it should name each component in the language the customer would use rather than in internal product codes.
Freight, Dimensional Weight and Kit Economics
Kits expose a cost problem that individual products hide: dimensional weight. A case full of air is charged by volume rather than by mass, and a poorly packed kit can cost more to ship than the components inside it. Every case dimension should therefore be evaluated against packed volume, not against how the kit looks on a shelf.
The practical discipline is to design the case to the components rather than the reverse. Lay out the frozen component list, arrange it in its densest nesting configuration, and take the case dimensions from that arrangement plus a small tolerance. Designing a case shape first and then finding components to fill it almost always produces a larger box and a higher freight cost per unit.
Kit economics have one genuinely pleasant feature: assembly cost is low and value perception is high. A set of six components assembled into a case, with a printed insert, can be priced well above the sum of its parts because the customer is buying a solution and a presentation. That margin uplift is the reason kits are worth the additional development complexity, and it is why the case and the inserts deserve budget priority over adding a seventh component.
Consolidation is the other lever. Because a kit brings several components into one production cycle, it is often possible to consolidate colours across them and reduce the number of separate material runs. Standardising on one neutral and one accent across every component is not only a design decision - it is a purchasing one that shortens the production schedule.
Two commercial habits protect margin. Order the printed inserts in the same cycle as the case, so paper and board shades can be matched before the run. And hold the case specification stable across seasons even when components rotate, because a new case means new tooling, new photography and a new pack-out process, all of which erode the advantage the kit format is meant to deliver.
Merchandising a Set: Planogram, Photography and Gifting
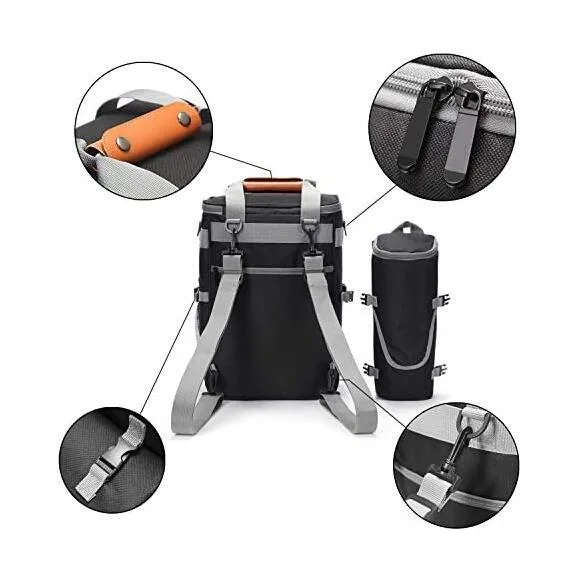
A kit merchandises differently from a single product because it has to communicate contents at a distance. A closed box gives no information; an open kit looks messy. The solution most brands land on is a display unit: one opened kit arranged as it would be unpacked, with the closed box standing beside it. That single display does the work of five product listings.
The opened display kit is worth engineering deliberately, exactly as a shelter display unit is. Components should be secured in place so the arrangement survives a season of customers handling it, and the arrangement should show every component at once rather than layering them. A display kit that has to be re-tidied weekly will be re-tidied for one week and then abandoned.
Photography for a kit needs a specific shot that single products do not: a flat lay of all components, arranged in a grid, on a plain background. That image is the single most effective conversion asset in the whole listing, because it answers the only real question - what do I get - in one glance. Compose it in use order and keep the arrangement identical across the tier ladder so the comparison is visual.
Gifting placement should be pursued deliberately around the fourth quarter and around travel seasons. A kit reads as a present in a way a bowl does not, and a secondary placement in a gift or travel section is usually winnable at low cost. Design the box so it needs no wrapping - no price-marked panel, no barcode on the front face, a finish that looks finished - and say so on the retailer's planogram note.
One cross-category note is worth planning for: because the kit is about travel, it sits naturally beside luggage and travel accessories. A restrained palette and a case that reads as luggage rather than as pet product makes that adjacency possible. Confirm the regulatory context for air travel from the IATA live-animal guidance and the FAA traveller information, and keep any travel claim factual and limited to what the guidance actually says.
Sampling, Compliance and the Launch Calendar
Sampling a kit is a coordination exercise more than a production one, because every component has its own development path. The efficient sequence is to approve components first on their own merits, then approve the assembled set with the case and inserts. Allow 6-10 working days for the assembly-and-case review and treat it as a distinct round rather than folding it into component approval, because packing problems only appear once everything is together.
Compliance for a kit is the sum of its parts, and that is the trap: each component may be compliant on its own while the set introduces a new question. Food-contact components, textiles and any liquid or fragranced item each carry their own obligations, and the set's labelling has to name the responsible party once and clearly. Verification through SGS on the first assembled lot is the cleanest way to close this out in one document rather than six.
Bulk runs 35-50 days after approval, with inspection at AQL 2.5. The defect list should be specific to sets: component count per case, correct component per slot, case construction and zip function, print registration on the case and the inserts, insert completeness, and the absence of any component rattle when the case is shaken. A count check on a sample from every carton is essential, because a missing component is the defect the customer notices first and the one that generates the worst review.
The calendar for a kit should be built backwards from the gifting and travel peaks. For a northern-hemisphere programme: components approved by late spring, case and inserts approved by early summer, bulk in mid-summer, and stock landed by early autumn so the set is on shelf well before the fourth quarter. Landing in November is the most common and most costly mistake in this category, because the kit's entire value proposition is being ready before the trip.
Two closing commercial points. Hold the case specification stable while rotating components seasonally, so each new edition reuses photography, tooling and pack-out. And treat the kit as the entry point to the range rather than the end of it - the range card inside the box is the cheapest customer acquisition available anywhere in the programme.
Order and quality terms
- MOQ 500 pieces per colourway; samples in 6-10 working days
- Bulk production 35-50 days after approval; AQL 2.5 inspection standard
- T/T 30/70 terms, FOB Xiamen, full document set per shipment
People Also Ask
What should be in a pet travel kit?
The essentials are a collapsible bowl, a water bottle, a portion of food with a scoop, waste bags and a small towel or blanket. A well-designed kit adds one consumable and a defined place for everything inside the case.
Are pet travel kits worth buying?
Yes, if the components are designed to work together rather than bundled from existing stock. The value is in the case, the packing and the coherence, not in the number of items.
How do I pack a travel kit efficiently?
Nest rigid components inside one another, use soft items as padding, and pack in use order so the first item needed is on top. A kit packed by use sequence is noticeably easier to live with.
Can a pet travel kit go in cabin luggage?
Cabin rules depend on the airline and the route, so check the carrier's own policy before travelling. Keep any travel claim factual and limited to what official guidance actually states.
What size travel kit do I need?
Match it to the trip: a small pouch for a day out, a structured case for a weekend, and a larger set with an exclusive component for a holiday. Tiering by trip length is the clearest way to choose.
How do you clean a pet travel kit case?
Wipe the lining with a mild detergent and allow it to dry fully before packing. Specify a wipe-clean lining when designing the case, because fabric linings hold odour and are the most common complaint.
Frequently Asked Questions
What is the MOQ for a custom travel kit?
MOQ is 500 sets. Components can usually be mixed across the three tiers within one order if the case, palette and logo system are shared, which is the most efficient way to launch a ladder.
How many components should a kit contain?
Four to six for a core kit. Restraint reads as quality: eight mediocre components look cheap, while four well-chosen ones look considered, and fewer components also improves margin.
Should the case be a rigid box or a reusable case?
For a travel kit, a reusable structured case. It converts packaging into function, justifies its cost, and is used on every trip - which keeps the brand visible long after the purchase.
How do we keep colours consistent across different materials?
Approve every component together under one light source against one set of Pantone references, and design a shade family: a tight tolerance on the core neutral, a wider stated band on the accent. Perfect matching across five substrates is not achievable.
How long does sampling take?
6-10 working days for the assembly-and-case review, treated as a distinct round after components are approved. Packing problems only appear once everything is together.
Should the kit include a consumable?
Yes. One consumable - wipes, waste bags or a travel-size shampoo - makes the kit feel generous and creates a repurchase reason. Ideally give it a defined refill slot in the case.
What inspection standard applies?
AQL 2.5 covering component count per case, correct component per slot, case and zip function, print registration, insert completeness and absence of rattle. Count-check a sample from every carton.
How do we avoid high freight cost on a bulky kit?
Design the case to the components rather than the reverse: arrange the frozen component list in its densest nesting configuration and derive case dimensions from that. Dimensional weight, not mass, drives the cost.
Can we sell the tiers as separate SKUs?
Yes, and it is the recommended structure. A three-tier ladder - day trip, weekend, holiday - gives the shopper a clear choice and gives the retailer a good-better-best story in one shelf block.
What inserts should be included?
Three: a contents card naming each component in customer language, a care card, and a range card showing the rest of the collection in the same palette. The contents card is the one that actually gets read.
How should a kit be displayed in store?
One opened display kit with components secured in place, beside a closed box. The display arrangement must survive a season of handling, so components should be fixed rather than layered.
What is the bulk lead time?
35-50 days after approval. Land stock by early autumn for the gifting and travel peak; landing in November is the most costly scheduling mistake in this category.
Do the components each need their own compliance file?
Each carries its own obligations, and the set adds a labelling question on top. Verify the first assembled lot as one set rather than six separate items, so retail compliance teams receive a single document.
Should the case design change each season?
No. Keep the case stable and rotate components seasonally, so photography, tooling and pack-out are reused. A new case resets all three and erodes the advantage of the kit format.
Talk to QUANZHOU JUNYUAN BAGS about a pet carrier program: MOQ 500 pieces per colourway, samples in 6-10 working days, bulk production in 35-50 days under AQL 2.5 inspection.
Get a free quote Request a sample